With Christmas just around the corner, decorations are already starting to be displayed in local stores and stocked on the shelves for purchase. Some are lovely enough but they usually come with a high price tag considering the materials they are made of and it’s more than likely that your neighbour will have the same set hanging on her tree.

Instead, save yourself some money and get your kids involved in decorating your tree with homemade and personalized ornaments such as this Popsicle Stick Santa Suit Yarn Ornament. It’s a great way for you and the family to express your festive creativity and for the kids to get involved in an easy craft that will have your Christmas tree looking fabulously stylized in no time.
This Popsicle Stick Santa Yarn Ornament is appropriate for ages 4 and older although, like most crafts that involve the use of glue and tools, parental oversight and guidance is a must for the younger children.
Here’s what you are going to need. The quantities recommended in the lists will enable you to create one ornament. Please adjust the quantities according to the number of ornaments you wish to make as well the number of little fingers that are going to be crafting!
Supplies Needed
- 4 Plain Popsicle Sticks (Standard size)
- Bright Red Paint
- Red String or Yarn
- White Craft Glue
- 1 White Glitter Foam Sheet
- 1 Black Glitter Foam Sheet
- 1 Yellow/Gold Glitter Foam Sheet
- Red and White Ribbon or Decorative String
Tools Needed
- Paintbrush
- Scissors
- Hole Punch
- Ruler
- Pencil/Pen
Directions
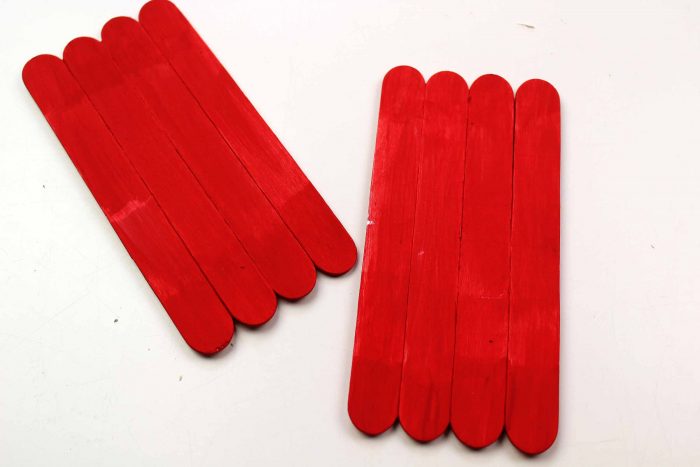
- Glue 4 popsicle sticks together, side by side. It’s best if you glue two at a time and wait a minute or so while applying pressure. This will help bind the popsicle sticks together. Once both sets are secure, glue them both together so that you now have the complete set of 4 popsicle sticks glued together.
An alternative to using white glue, especially if you don’t want to wait as long for the popsicle sticks to dry, is to use a hot glue gun. If you do decide to use the hot glue gun instead, please make sure to complete this first step for your kids.
- Paint the popsicle sticks red and allow the paint to dry completely. To make sure that your paint really pops with color, paint 2 coats. It takes about 10 minutes to dry between coats.
- Once your paint is dry, take your red string or yarn and wrap it around the popsicle sticks until all popsicle sticks are completely covered. Once you cut the string, tuck it into the layered ornament to avoid the string peeking out anywhere and to avoid any unravelling.
Alternative Option: If you want to do away with wrapping your popsicles with red string or yarn, make sure that you have painted at least 2 coats of red paint on your popsicle sticks. Use your discretion if you feel that you may need more coats applied.
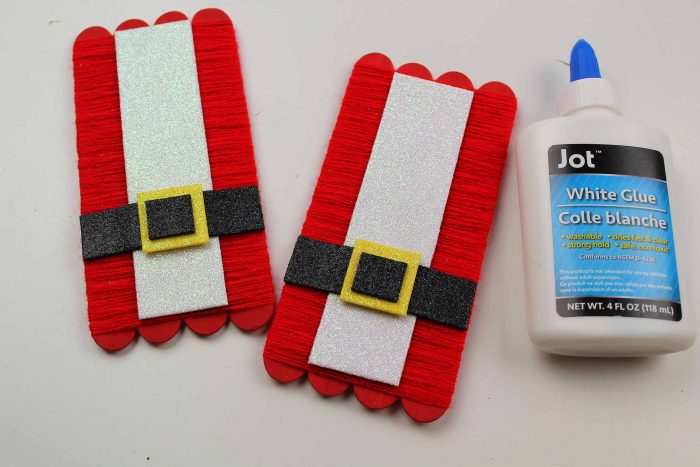
- Cut a rectangular shape the length of the popsicle sticks and about half of the width of the popsicle sticks from the white glitter foam to create a belt and glue onto the middle so that there is equal spacing on either side.
- Cut a smaller rectangular shape as long as the width of the popsicle stick from the black glitter foam to create the belt and glue it on.
- Cut 2 squares for the belt buckle. One larger square from the yellow/gold glitter foam and one smaller square from the black glitter foam. Glue on the yellow/gold square first and then the black as seen in the image.
*Use a ruler and pencil/pen to make your shapes neat.
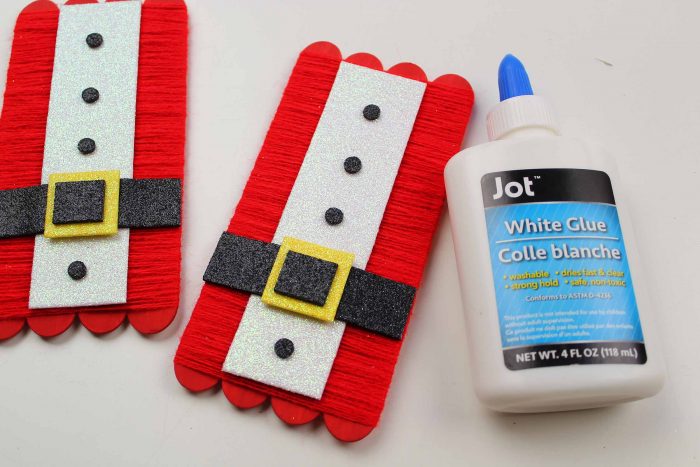
- Once the buckle is done, take some of the black glitter foam and punch 4 holes. Glue each punched black circle in place as buttons on Santa’s suit.
- Once the glue on the glitter foam shapes has dried, loop a ribbon or decorative string and glue it onto the back of the ornament. If you are worried about the glue not being strong enough, just add a bit of duct tape over the glued section (once dry).
If you want to eliminate the need for using any paint and lessen the supplies, you can easily purchase red popsicle sticks from your local craft store or online here. Then simply skip step 2 of the directions above.
This popsicle ornament craft takes about an hour in total to make, including the time you will need to wait between the paint and glue drying.
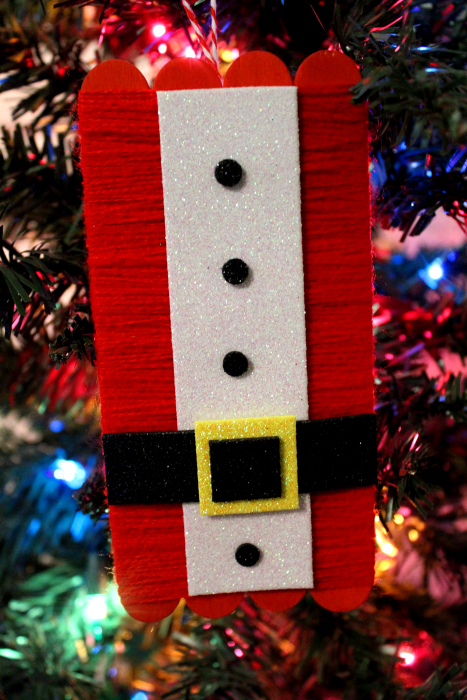
Now that the ornament is complete, let your little one help you hang it on the Christmas tree as I’ve done here. If you want to remember who made which ornament, just take a dark marker pen and add an initial to the small section of popsicle stick at either end which won’t have been covered by the red string.
Popsicle Stick Santa Suit Yarn Ornament Gifts
So your Christmas tree is looking great…but why stop there? These Popsicle Stick Santa Suit Yarn Ornaments will be fantastic as gifts to friends and family with a special sentimental touch having been made by you. I mean, everyone needs a Santa ornament of some kind to add to the Christmas tree, right?
These also make great appreciation gifts for teachers. Making a gift set of 4 and placing them in a small gift box or organza gift bag usually works quite well and looks super professional, not to mention adorable!
The way you can spread the Christmas cheer with these popsicle stick ornaments is really endless!
If you enjoyed this DIY Christmas craft, head on over to my other post on 7 Handmade Ornaments That Make Fun Gifts. It will give you some great ideas on other ways to make your Christmas tree a real showcase this season leaving everyone wanting to know how to make them!

Popsicle Stick Santa Suit Yarn Ornament
Save yourself some money and get your kids involved in decorating your tree with homemade and personalized ornaments such as this Popsicle Stick Santa Suit Yarn Ornament.
Materials
- 4 Plain Popsicle Sticks (Standard size)
- Bright Red Paint
- Red String or Yarn
- White Craft Glue
- 1 White Glitter Foam Sheet
- 1 Black Glitter Foam Sheet
- 1 Yellow/Gold Glitter Foam Sheet
- Red and White Ribbon or Decorative String
Tools
- Paintbrush
- Scissors
- Hole Punch
- Ruler
- Pencil/Pen
Instructions
Glue 4 popsicle sticks together, side by side. It’s best if you glue two at a time and wait a minute or so while applying pressure. This will help bind the popsicle sticks together. Once both sets are secure, glue them both together so that you now have the complete set of 4 popsicle sticks glued together.
**An alternative to using white glue, especially if you don’t want to wait as long for the popsicle sticks to dry, is to use a hot glue gun. If you do decide to use the hot glue gun instead, please make sure to complete this first step for your kids.
Paint the popsicle sticks red and allow the paint to dry completely. To make sure that your paint really pops with color, paint 2 coats. It takes about 10 minutes to dry between coats.
Once your paint is dry, take your red string or yarn and wrap it around the popsicle sticks until all popsicle sticks are completely covered. Once you cut the string, tuck it into the layered ornament to avoid the string peeking out anywhere and to avoid any unravelling.
Alternative Option: If you want to do away with wrapping your popsicles with red string or yarn, make sure that you have painted at least 2 coats of red paint on your popsicle sticks. Use your discretion if you feel that you may need more coats applied.
Cut a rectangular shape the length of the popsicle sticks and about half of the width of the popsicle sticks from the white glitter foam to create a belt and glue onto the middle so that there is equal spacing on either side.
Cut a smaller rectangular shape as long as the width of the popsicle stick from the black glitter foam to create the belt and glue it on.
Cut 2 squares for the belt buckle. One larger square from the yellow/gold glitter foam and one smaller square from the black glitter foam. Glue on the yellow/gold square first and then the black as seen in the image.
*Use a ruler and pencil/pen to make your shapes neat.
Once the buckle is done, take some of the black glitter foam and punch 4 holes. Glue each punched black circle in place as buttons on Santa’s suit.
Once the glue on the glitter foam shapes has dried, loop a ribbon or decorative string and glue it onto the back of the ornament. If you are worried about the glue not being strong enough, just add a bit of duct tape over the glued section (once dry).
Notes
If you want to eliminate the need for using any paint and lessen the supplies, you can easily purchase red popsicle sticks from your local craft store or online here. Then simply skip step 2 of the directions above.
